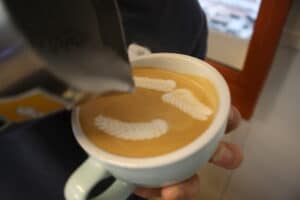
Victor Vu presents a festive hedgehog design inspired by a World Latte Art Champion.
To cap off a really big year, I thought I’d share with you my fun take on the hedgehog design originated by 2018 World Latte Art Champion Irvine Quek from Malaysia.

Irvine has been a big inspiration to me on my latte art journey, and his cute and fun design is something I used to practice while building my latte art technique. After repeatedly pouring this pattern, I began to add my own little flourishes to give the hedgehog a greater sense of character.
The leaves and berries create more detail in the cup and give a sense of scale, so the design begins to tell a story. It’s not just a hedgehog but a small hedgehog out for lunch looking for some fruit. The hat is like a cherry on top, giving the pattern a ‘jolly’ vibe that’s just right to practice over Christmas.
The design may look complicated, but for any skilled barista it’s easier to pour than many of the patterns you’d see at a latte art championship. To create the design, you need a good understanding of swaying and dragging when pouring, spacing, and awareness of how your pour fills the cup, and how to drop only small amounts of foam when creating the fruits or berries.
This makes it perfect for a barista who has mastered their basic patterns and want to move onto something that will impress any customer or co-worker. So, get practicing, and while you do, think of elements you can add or change to make the design your own. That’s how every competitor in the World Latte Art Championship got started, and maybe one day you’ll be there too.
BeanScene is now on LinkedIn! Follow HERE to stay up to date on all things coffee.
This article appears in the December 2021 edition of BeanScene. Subscribe HERE.
Victor Vu’s Christmas Hedgehog
Step 1
Build your base with the handle at three o’clock.
Step 2
Starting from nine o’clock, pour a 10-leaf rosetta up the side of the cup. Pour a second 10-leaf rosetta from the same starting point pointing downwards.
Step 3
On the right side of the cup, pour a curved 10-leaf rosetta ending just below the handle. This is the hedgehog’s spines.
Step 4
Within the curve of that rosetta, pour a seven-leaf rosetta, but pull through on the right side rather than through the centre forming the back.
Step 5
Below the two new rosettas, pour a perpendicular, straight nine-leaf rosetta to act as the ground.
Step 6
In a single pour, drag a small foot then turning up along the back, looping above the back to form the face and eye, pulling up for a snout, then turning back down and jutting out about halfway down the line to form an arm.
Step 7
Above the head and spines, pour a small triangle-like shape to form a hat.
Step 8
Drop a few small amounts of foam between the leaves and the hedgehog’s arm for the berries.


